 by
by While you are using your computer PC crashes cause of Video Scheduler Internal Error. You will not have the chance to save any work on your system when this BSOD error occurs. This error is usually happened by graphic driver issues. It also causes due to malware.
There are different ways to fix this BSOD error. This guide will help to know what this error is, its causes, and possible solutions to fix it.
Contents
What is Video Scheduler Internal Error?
Stop error means a Blue Screen of Death (BSOD) is technical. When Windows is affected by a serious issue and is forced to stop completely this type of error occurs. BSOD errors can come in all Windows operating systems, including Windows 7, 8, 10, Windows Vista, Windows XP, and Windows 98/95.
When you recently installed new hardware or software, the BSOD error, VIDEO_SCHEDULER_INTERNAL_ERROR, occurs suddenly.
The error message appears;
“Your PC ran into a problem and needs to restart. We’re just collecting some error info, and then we’ll restart for you. (0% Complete)”
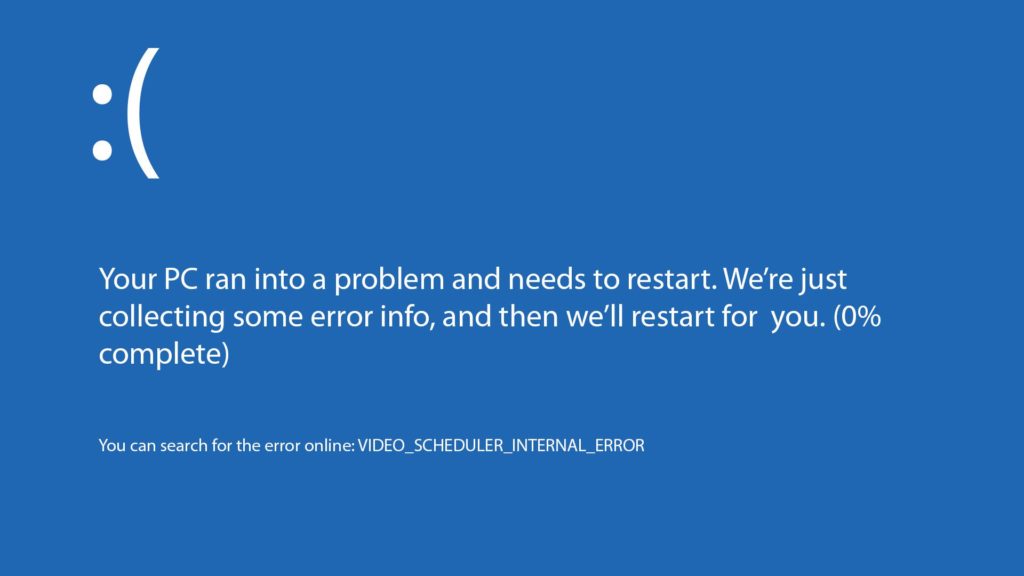
You will only have to wait for the process to reach 100% and then look for a solution, once a blue screen with this message appears on your screen
What causes this Video Scheduler Internal Error?
Before trying to fix this error, it is very important to know the cause of it. this BSOD error can result from several reasons when you look at user reports and the repair strategies used to fix this specific issue; you will find out. But the main reason is graphics card driver issues. However, some of the reasons are mentioned below.
- Outdated or corrupted graphics drivers
- Corrupt Windows System files
- Corrupt Windows Registry
- Hardware issues
- Incompatible drivers
- Malware or virus infection
This will help you to understand the causes of this error and it will help you to find the right solution to fix it.
How to Fix Video Scheduler Internal Error
Now we can see how to fix this error with the below-listed troubleshooting guide. Also, Ensure that you create a restore point just in case something goes wrong.
Solution 1 – Run System File Checker (SFC) and Check Disk (CHKDSK)
Step 1: – Press the Windows Logo Key + X together and then click on Command Prompt (Admin).
Step 2: – Now add the following in the cmd and hit the enter button on your keyboard:
Sfc /scannow
SFC /scannow /offbootdir=c:\ /offwindir=c:\windows
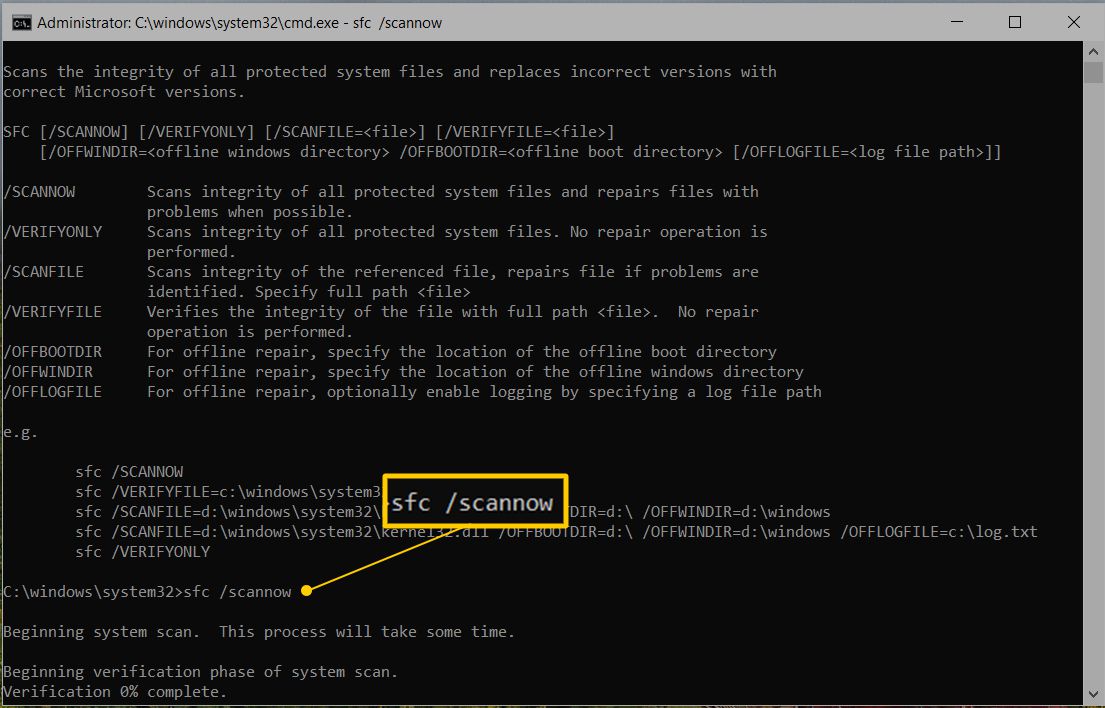
Step 3: – You have to Be patient and wait for the process to be complete, and once done then restart your computer.
Step 4: – Now you need to run CHKDSK.
Step 5: – then Allow the process to be complete and again reboot your computer to save changes.
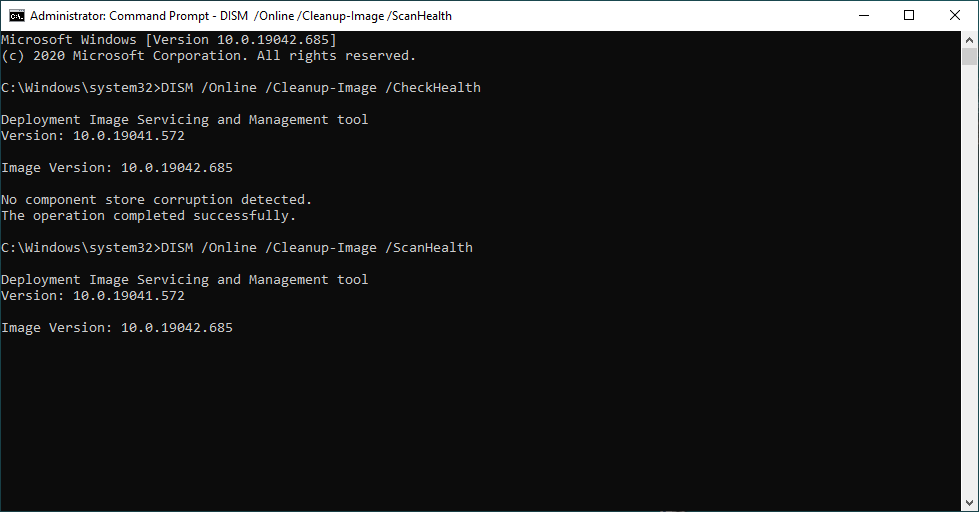
Solution 2 – Run DISM (Deployment Image Servicing and Management)
Step 1: – Press the Windows Logo Key + X together and then select Command Prompt (Admin).
Step 2: – Now type the below command into cmd one by one and then press the Enter button on your keyboard:
Dism /Online /Cleanup-Image /StartComponentCleanup
Dism /Online /Cleanup-Image /RestoreHealth
Step 3: – If the above command is not working, then you should try this below:
Dism /Image:C:\offline /Cleanup-Image /RestoreHealth /Source:c:\test\mount\windows
Dism /Online /Cleanup-Image /RestoreHealth /Source:c:\test\mount\windows /LimitAccess
You have to replace the C:\RepairSource\Windows with the location of your repair source (Windows Installation or Recovery Disc).
Step 4: – You should run the DISM command to verify the integrity of the system, instead of running SFC /scan now:
Dism /Online /Cleanup-Image /CheckHealth
Step 5: – Then reboot your computer to save changes.
Solution 3 – Uninstall Graphic Card Driver
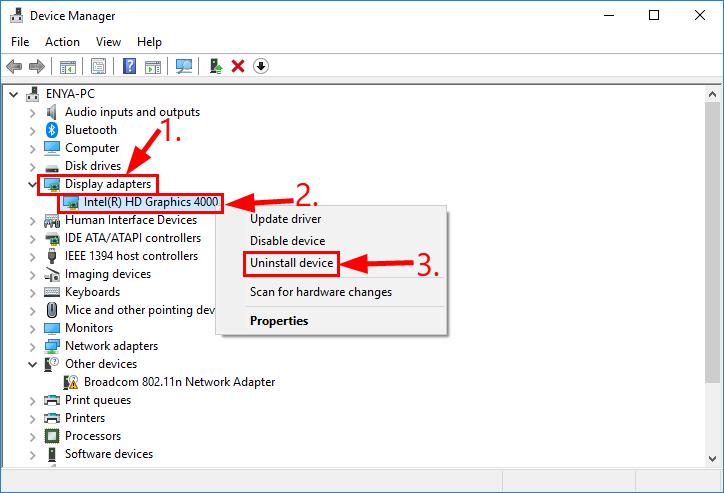
Step 1: – You have to access the device manager and right-click on your NVIDIA graphic card and click on Uninstall. Click on Yes, If asked for confirmation.
Step 2: – In Windows Search Type control and click on Control Panel from the search result.
Step 3: – On Control Panel, click on Uninstall a Program.
Step 4: – Then uninstall everything related to NVIDIA.
Step 5: – To save the changes and again download the setup from the manufacturer’s website, Reboot your system.
Step 6: – If you are sure that you have removed everything then try installing the drivers again. The setup should work without any problems.
Solution 4 – Run Disk Clean-up
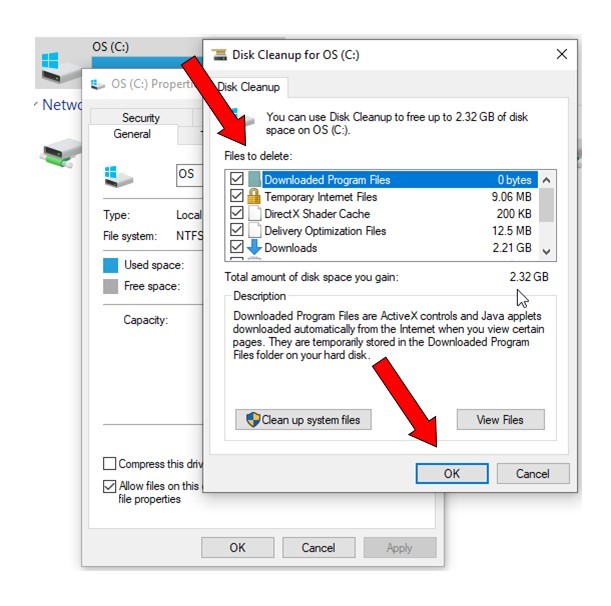
In fixing video scheduler internal error this solution is effective. It helps you delete the required unnecessary and temporary files depending upon your need. To run disk clean-up steps are as follows
Step 1: – Select This PC or My PC and right-click on the C: drive to select Properties.
Step 2: – from the Properties window, click on Disk Cleanup under capacity.
Step 3: – how much space Disk Cleanup will be able to free to calculate, It will take some time
Step 4: – In the bottom under Description click on Clean up system files
Step 5: – Make sure to select everything under Files to delete and then click OK to run Disk Clean-up that opens In the next window.
Step 6: – Let the Disk Cleanup complete after that restart your PC to save changes. Again run the setup, and then this may be able to Fix Video Scheduler Internal Error.