To resolve some issues, you may need to clear your web browser’s caches and cookies and change some settings. However, this may cause another problem: the network connection may become unavailable. In a circumstance like this, you can flush DNS to reset IP to restore normalcy.
We’ll show you how to flush DNS on Windows and Mac in this post.
If you are working on a shared or public computer, you must request that the network administrator perform the task.
Contents
How To Flush DNS on Windows 10, 8.1, and 8?
If you are running Windows 10, 8.1, or 8, you can reset your IP address and flush your DNS by following these steps:
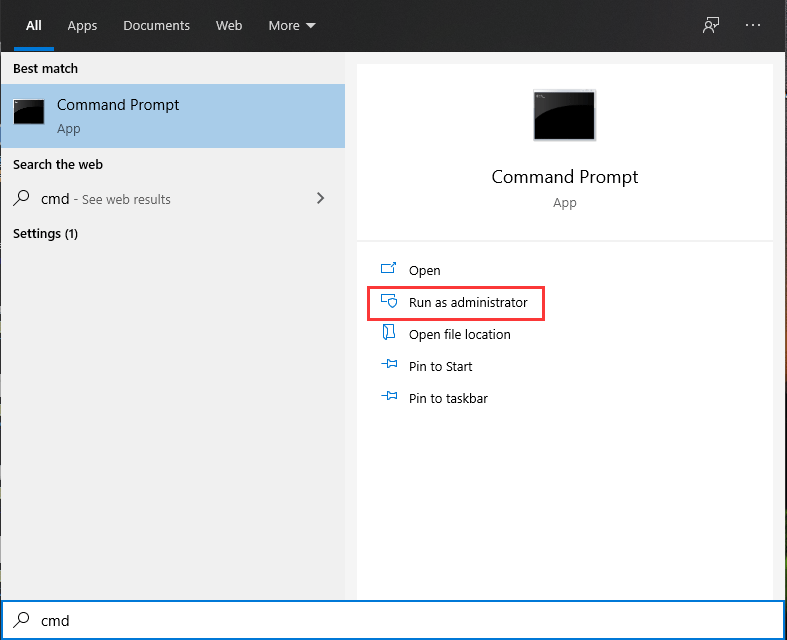
- Step 1. Use Windows Search to find cmd and then choose Run as administrator.
- Step 2. If you see the User Account Control box, click Yes.
- Step 3. Enter the following flush DNS commands one at a time, pressing Enter after each one.

ipconfig /flushdns

ipconfig /registerdns

ipconfig /release

ipconfig /renew

netsh Winsock reset
- Step 4. Restart your computer.
How Do You Flush DNS in Windows 7?
If you are using Windows 7 version, you can flush DNS on your machine by following this guide:
- Step 1. Press the Start button.
- Step 2. Select All Programs > Accessories from the menu.
- Step 3. Locate and right-click Command Prompt. Then choose Run as administrator.
- Step 4. If you receive an interface asking if you want to allow this Application to make changes to your computer, click Yes to proceed.
Note: Don’t hesitate to get in touch with your system administrator if an administrative login is required.
- Step 5. Enter the following flush DNS commands one at a time, pressing Enter after each one.
ipconfig /flushdns ipconfig /registerdns ipconfig /release ipconfig /renew netsh Winsock reset
- Step 6. Restart your computer.
How Do You Flush DNS on Windows XP and Vista?
If your machine is still running Windows XP or Vista, you must perform the following steps to flush DNS:
- Close all the web browsers that are open on your PC.
- Go to All Programs > Accessories > Command Prompt after clicking Start.
- Press Enter after entering the flush DNS command ipconfig /flushdns.
If the command is successful, you will see the message DNS Resolver Cache Successfully Flushed. However, if you read Action Requires Elevation, you will need to contact your computer administrator to request assistance.
How Do I Flush DNS on a Mac?
If you’re using a Mac, you’ll need to follow this guide to flush DNS and reset your IP address:
- Step 1. Ensure that all web browsers on your computer are closed.
- Step 2. Select Application, then Utilities > Terminal.
- Step 3. In different Mac OS X versions, open the Terminal window and type the correct flush DNS command:
- You must do sudo killall -HUP mDNSResponder if running OS X 10.11 – 11.0 (Catalina, Sierra, High Sierra, Mojave, Catalina, and Big Sur).
- When using OS X 10.10 (Yosemite), type sudo discovery until mdnsflushcache.
- You must do sudo killall -HUP mDNSResponder if you are running OS X 10.7 – 10.9 (Mavericks, Mountain Lion, or Lion).
- If you’re running OS X 10.6 or earlier, you’ll need to run sudo dscacheutil –flush cache.
- Step 4. Hit the Enter key.
The DNS cache should be cleared after these actions.
Other Tasks You Might Need to Complete
If the network connection problem persists after lush DNS, you may need to power cycle your modem and router.
- Turn off your computer.
- Wait around 15 seconds after turning off your modem and router.
- Wait around 2 minutes after plugging in your modem.
- Wait around 2 minutes after plugging in your router.
- After completing these procedures, you can restart your computer to see if the network connection problem has been resolved.


