 by
by Sedlauncher is the most important part of KB4023057 in the windows 10 operating system update package. And sedlauncher is mainly designed to improve the speed and working of the Windows update service on your windows 10 operating system.
But most of the users have reported that after they run the KB4023067 windows update, the complete CPU of their PC is running at full capacity. It means that it is completely slowed down, even the simple tasks like copy and pasting a file take a longer time.
If you are facing such issues don’t panic at all you are at the right place. We are here to resolve your issues. In this article we have given some best ways to resolve these errors. After performing these tasks you are able to start using your PC normally.
Contents
How users can resolve sedlauncher high CPU usage?
1. Always make sure to stop and disable Windows Remediation Service process
2. Completely delete Windows setup remediations
3. Try to disable the REMPL task
4. Always block windows remediation service via firewall
1. Always make sure to stop and disable Windows Remediation Service process
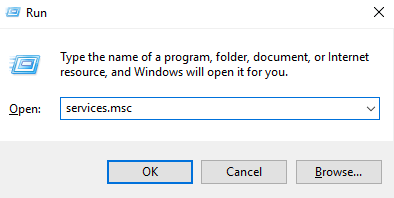
1) Simultaneously press windows key along with R key from your keyboard and type services.msc in the dialog box appears and hit enter key from your keyboard or select OK form the screen.
2) And then scroll down straight down within the list of the given services and search for windows remediation service (sedsvc) option.
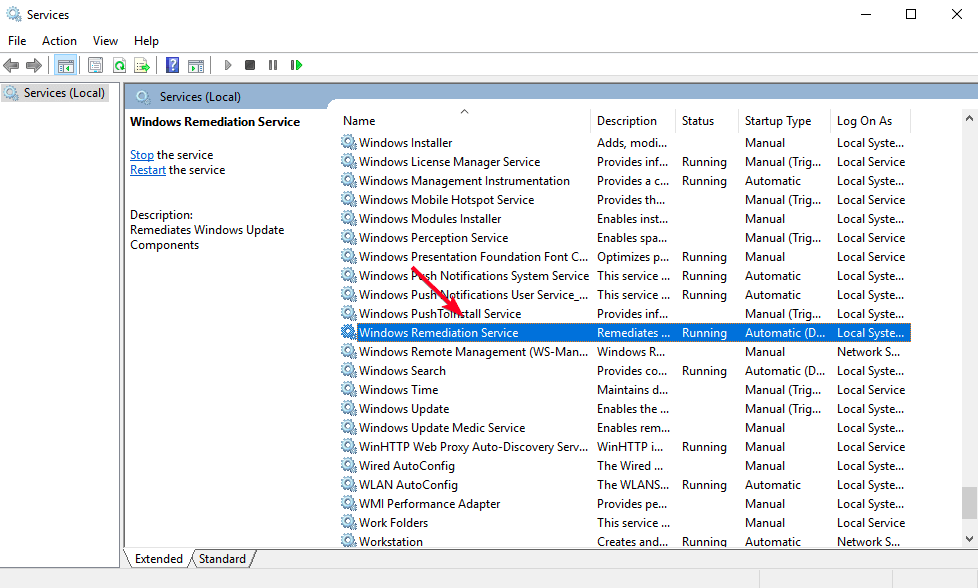
3) After that double click on that and start up the properties window appeared on the screen.
4) From the general tab section, below the start-up type, choose and select the dropdown list and then choose disable option.
5) After that Choose apply option to see whether the issue persists or not. If it still persists, move on to the next fix given below.
2. Completely delete Windows setup remediations
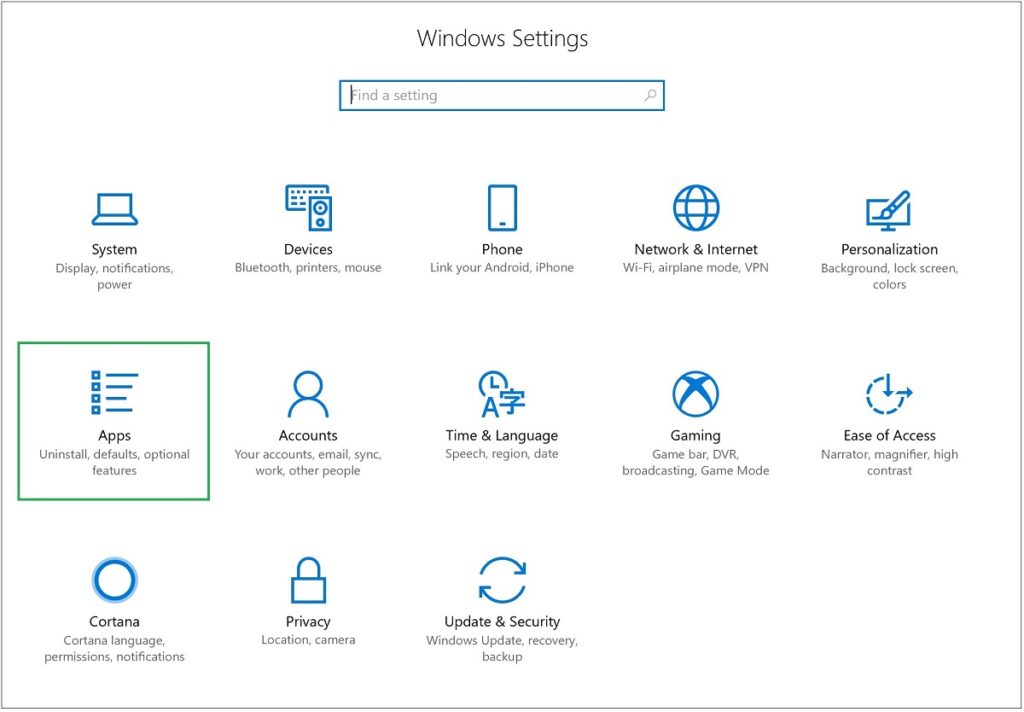
1) User has to simultaneously press the Windows logo key along with the I key from the keyboard to start up the windows settings option.
2) Then choose Apps.
3) Under the apps and features option, users have to scroll down until the user will find Update for windows 10 for x64-based systems (KB4023057) or windows setup remediations (x64) (KB4023057).
4) Then choose and double click on the program, and select the uninstall option.
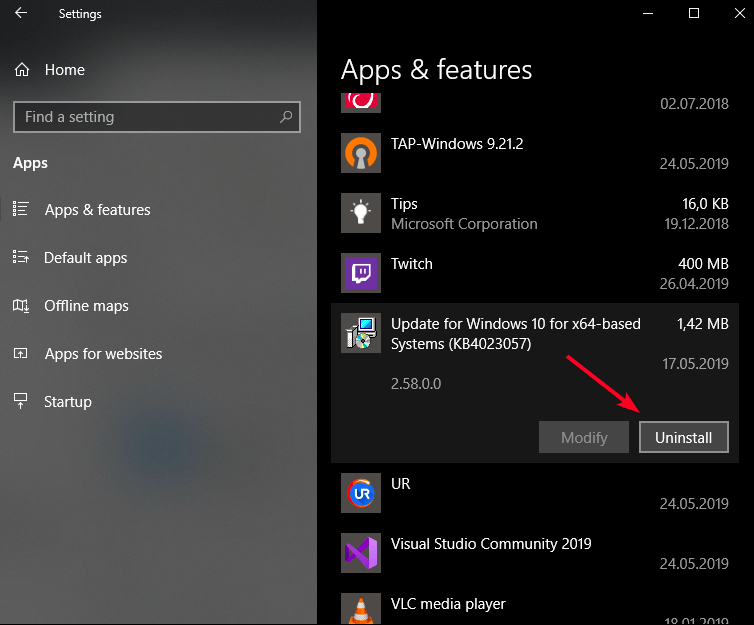
5) And check whether the error is resolved or not. If resolved you are good to go and if not move on to the next fix given below.
3. Try to disable the REMPL task
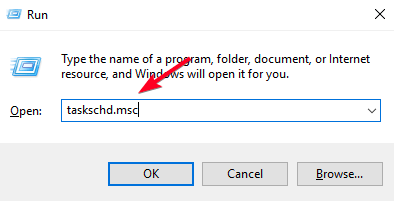
1) Simultaneously click Windows logo key and R key from the user’s keyboard and type taskschd.msc in the running dialog box. And press enter key from the keyboard.
2) Under the task scheduler option, users have to click on the arrow next to the task scheduler library to operate the given drop down list.
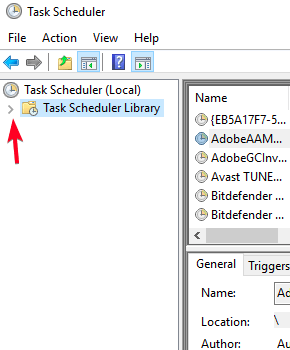
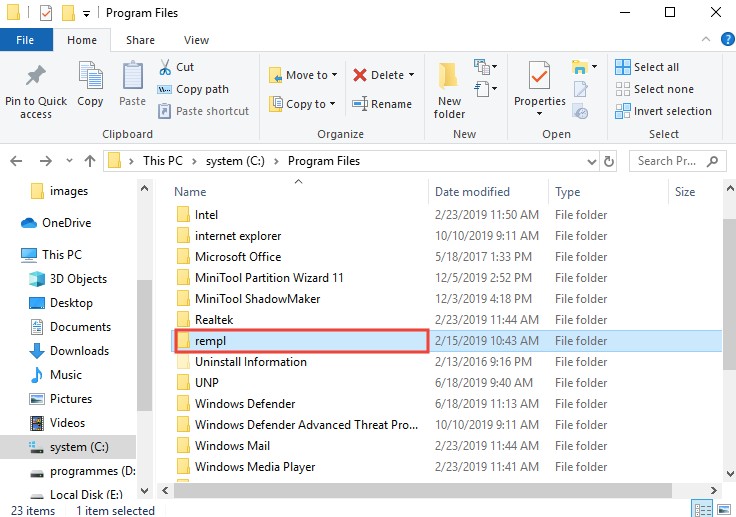
3) And then the user has to navigate to the Microsoft > windows > rempl folder.
4) After that on the right most panel of your window screen, you will notice a shell task.
5) Then select the task and choose the delete key and then choose yes to confirm.

Check whether the error is resolved or not if not don’t panic at all. Move on to another fix given below.
Read More: The Best App To Watch Movies For Free: Flixanity Apk
4. Always block windows remediation service via firewall
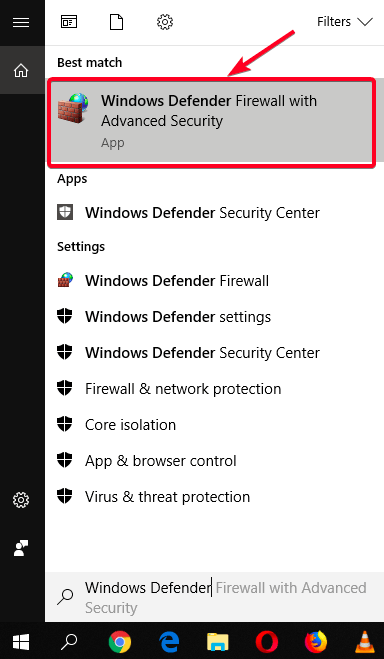
1) First of all choose on the Cortana search box, and then type within windows defender firewall and then start it.
2) Then choose and click on advanced settings form the left sided menu.
3) Then select the outbound rules option.
4) Then choose on to the new rule form the upper right corner of the screen.
5) Under the pop up window screen, choose the program option, and then select on the next key or button.
6) Then the user has to navigate to the location of the Windows remediation service on your hard drive of the user.
The path is: (C:>Program Files>rempl).
7) Then you have to select the sedsvc.exe file option and then choose next 3 times to complete the whole process.
8) Then the user has to enter a name for your new rule and then choose the finish option.
After completion of the above process the user has to check whether it is running properly or not if not you can shut down your PC and restart it again.
In the above article we have tried to explore some of the best ways to resolve the speeding issues which were caused by the sedlauncher process on the Windows 10 operating system.